
As you can see, my blog header is now animated! With the help of my friend we were able to find a workaround for blogger not displayng animated GIF's the way they should be displayed.
If anyone has plans of using animated graphics on their Blogger page and isn't sure how to get them working, just follow these steps. If you know your stuff, just skim over the bolded text.
- Host your GIF on another site. I'm using Imageshack at the moment and it seems to be working swell. You CAN upload it to Blogger, but it seems that the place your images are stored will not support your animated GIF's, but is more than happy to accept them and only display the first frame. That was the problem I was running into before.
- Once you have a media site hosting your GIF, make sure to view your GIF on the hosting site to make sure it's still working properly. Select your image and right click on it (or look nearby for any sharing options) . Imageshack features a "Share it" option, other sites *should* have something similar. Clicking on this option will bring up different links meant for different purposes.
- There should be several different links for you to copy and paste. Forums, thumbnails, etc. Click on the contents in the "Direct" field, and make sure all of the text is highlighted and copy that text.
- Now that you have your direct link to your host, try uploading the GIF to your Blogger site by clicking on the "Add Image" tool, then select "Or add an image from the web". Paste your link in that field, and save.
That should do it.
Sunday, May 16, 2010
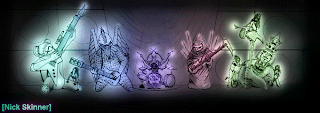
Cool New Banner---
The only trick now is to figure out why it won't cycle through the frames. I sure hope that I can use this as my banner someday. I fixed up the current one I have, but uhhm...It won't display the frames its made up of (it's a GIF). It ACCEPTS GIF's apparently, but I think the whole image gets converted to a PNG after being uploaded. Laaaaame.
Clicking on it will send you to the animated version in my Deviant Art gallery.
Clicking on it will send you to the animated version in my Deviant Art gallery.
Saturday, May 15, 2010
Back to the Basics?
So I was checking out some book lists online. Just to see what some highly rated/current books are out there for learning the dark and mysterious art of 3D. It turns out I have in my possession one of the top books on the list! After giving it a quick skim-through, I found that there was a lot in it that I knew very little or nothing about. It's been almost 2 years since I purchased this book for school and it's not until now that I'm going through it. I think I completed the first couple chapters, but after that it was just "rush, rush, rush, get everything done", and sadly, the book eventually found itself in a stack of other books.
Well no more! It's free of dust, and it's being absorbed whether I have to go through it with a magnifying glass carefully reading every line of text, or if I have to rip out the pages, throw them in a bowl and have a textbook salad. It's totally getting done.
Well no more! It's free of dust, and it's being absorbed whether I have to go through it with a magnifying glass carefully reading every line of text, or if I have to rip out the pages, throw them in a bowl and have a textbook salad. It's totally getting done.
Tuesday, May 11, 2010
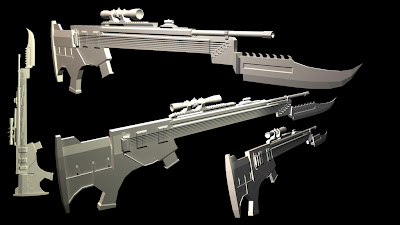
It's a guuun, and a Geeee-tarr.
It's for the character I just modeled. I Haven't had much experience in modeling/texturing hard edged objects, so I thought this would be great practice, and also a fun object to create. designing it was enjoyable, and I had to do some thinking about the placement of the components for both the gun and guitar parts. The final tri count is 3954, with a 2048 spec, normal and diffuse map (oh yes, those maps are getting shrunk) .
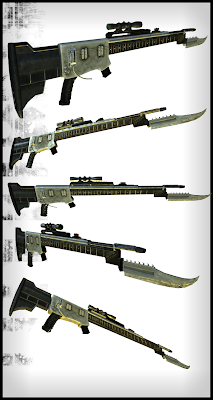
I scaled the maps down to 1024x1024 and I honestly could not tell the difference. Here's a couple shots of it with its map sizes cut in half. The geometry remains the same at 3954 tris.
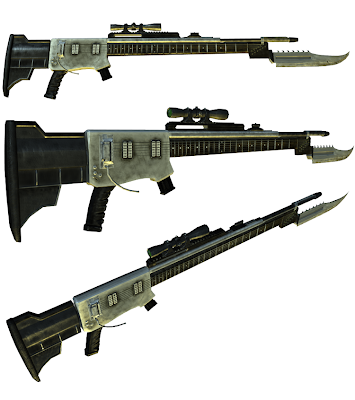
The final version without textures, only a normal map applied.
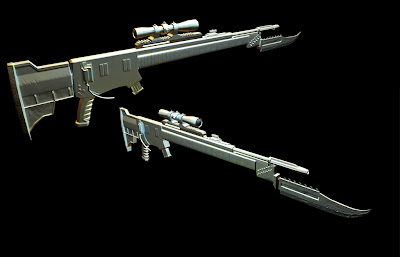
Here's the earliest version of it. It's made up of 3.8k tris.

Ping, Lead Guitar
See the guy on the far left of my banner? I decided to model him, he's the first humanoid model I've done in a while. I was pleased with the results. Here he is, at 5046 tris with a 2048 diffuse, spec, and normal map. I tried to keep him low-ish but still look pretty good if animated. I changed up the original design a bit, I thought that the X'ed-out eyes didn't lend much to the character, so I tried something different.
I thought 2048 was somewhat standard, so I went with 2048 just to be safe. From what I have learned with the guitar rifle, I could probably scale it down to 1024 and have it look close to the same, if not identical.
First time ever using spec maps. They're quite powerful I'm finding out. I was able to add a lot of detail in with the normal and diffuse map. For example, the stitches, eyes, wrinkles, elbow pads and knee pads are not quite fully modeled as part of the actual geometry, yet they really stand out as if they were. Those parts were a high priority and something I set out to accomplish with this character model early on.

Mine
I created this as a test scene for something that could be used in a sidescrolling video game. I was introduced to normal mapping with this scene and also practiced bettter texturing methods. "Better" being the keyword there, I've still got a looonng ways to go of course.
The goal for this was to create a simple scene that held a minimal amount of geometry, while keeping it looking pretty nice. I uploaded the two renders I liked the most as large images, and also included the work in progress sheet.
I've been a big fan of the original Diablo game since, jeez... probably since it was released back in 1997? The cave levels really stuck with me for some reason, and while creating this, I kept imagining it. I guess you could say it provided me with some inspiration for this.


Update
So it's been a while since my last update. I took a much needed break to see if it's what I actually wanted to do. The last couple months was a lot of independent learning and I have some completed projects to show. I can safely say that I do still enjoy the work. Perhaps it was the ending of school and the start of a (completely unrelated) new job immediately after that lead me astray. That, and knowing about a lot of things, but not actually knowing anything.
I think the time away really helped me collect myself and figure out where I wanted to be career-wise. I'm spending a lot of time improving, or trying to anyway. I am much more dedicated now than I was when I made my last posts, that's for sure. Despite forgettting a lot of my broad and totally unrefined skills, I focused more on doing less things at once to get an actual understanding of things. I have become much better at texturing and modeling, and I think it shows. At least I'm much more comfortable with it now.
I think the time away really helped me collect myself and figure out where I wanted to be career-wise. I'm spending a lot of time improving, or trying to anyway. I am much more dedicated now than I was when I made my last posts, that's for sure. Despite forgettting a lot of my broad and totally unrefined skills, I focused more on doing less things at once to get an actual understanding of things. I have become much better at texturing and modeling, and I think it shows. At least I'm much more comfortable with it now.
Friday, May 29, 2009
Model Progression Renders
These three images show the different stages that each model went through during my time modeling them. I'm pretty happy with how they've turned out. These models were part of my work term (workterm2) for this year. This was my first time modeling aiming for lower poly counts. The top two models are supposed to be zombies, and the third, male human.


Wednesday, May 13, 2009
Glassy 1
I thought it would be a cool idea to play with a glass shader, so I did up this quick animation for practice. When I tested this out in several different media players, I got a different result each time.
Monday, May 11, 2009
On the Lift
Now this was something! it's quite large, and took a LONG time to make. I think it was something like..2+ hours of rendering? I know that's probably nothing at all, but hey, it was my first big rendering job, and it was a lot of work! Anyhow --this has got to be my favorite thing I produced as of yet, and even though the rendering was a bit rigorous, it was still exciting. It Kind of reminds of when I'm waiting for things to cook in the oven. This was totally worth waiting the two hours though, all the work/waiting paid off. Still, there are these little weird spots in the rendered video that aren't appearing on my individual frames. I Better look into that.
Turns out the video came out really dark after the upload, so some details are hard to see if not impossible.
Turns out the video came out really dark after the upload, so some details are hard to see if not impossible.
Short Strolls
These are a few videos I rendered of my character walking down a basic scene I created. I tried experimenting with lighting and camera work mostly. I think the scene looks neat without the textures, leaving the lighting to do the work. It was only until recently that I found out that the graph editor can be quite useful for cleaning up animation.
Thursday, April 23, 2009
A playblast of a scene I put together today for some practice. I'm new to using the camera, so the fly-through is a bit shaky. It was a lot of fun to play around with though. I may follow up with a different version of the same scene since there's lots of room to build upon.
I'd like to thank cgtextures.com for providing all the great textures I was able to work with for the basis of my scene's textures.
Tuesday, April 14, 2009


Subscribe to:
Posts (Atom)
